Sous Vide Cooking: The hard way 2
… and the whole thing worked for about 2 minutes. Then everything went up in smoke and a very bad smell filled the room. We opened the whole thing up again and had to realise, that the smoke came from the coil of the stirrer motor. We have hooked the motor the wrong way to the plug and managed to drive way too much current through the coil. So there goes the motor.
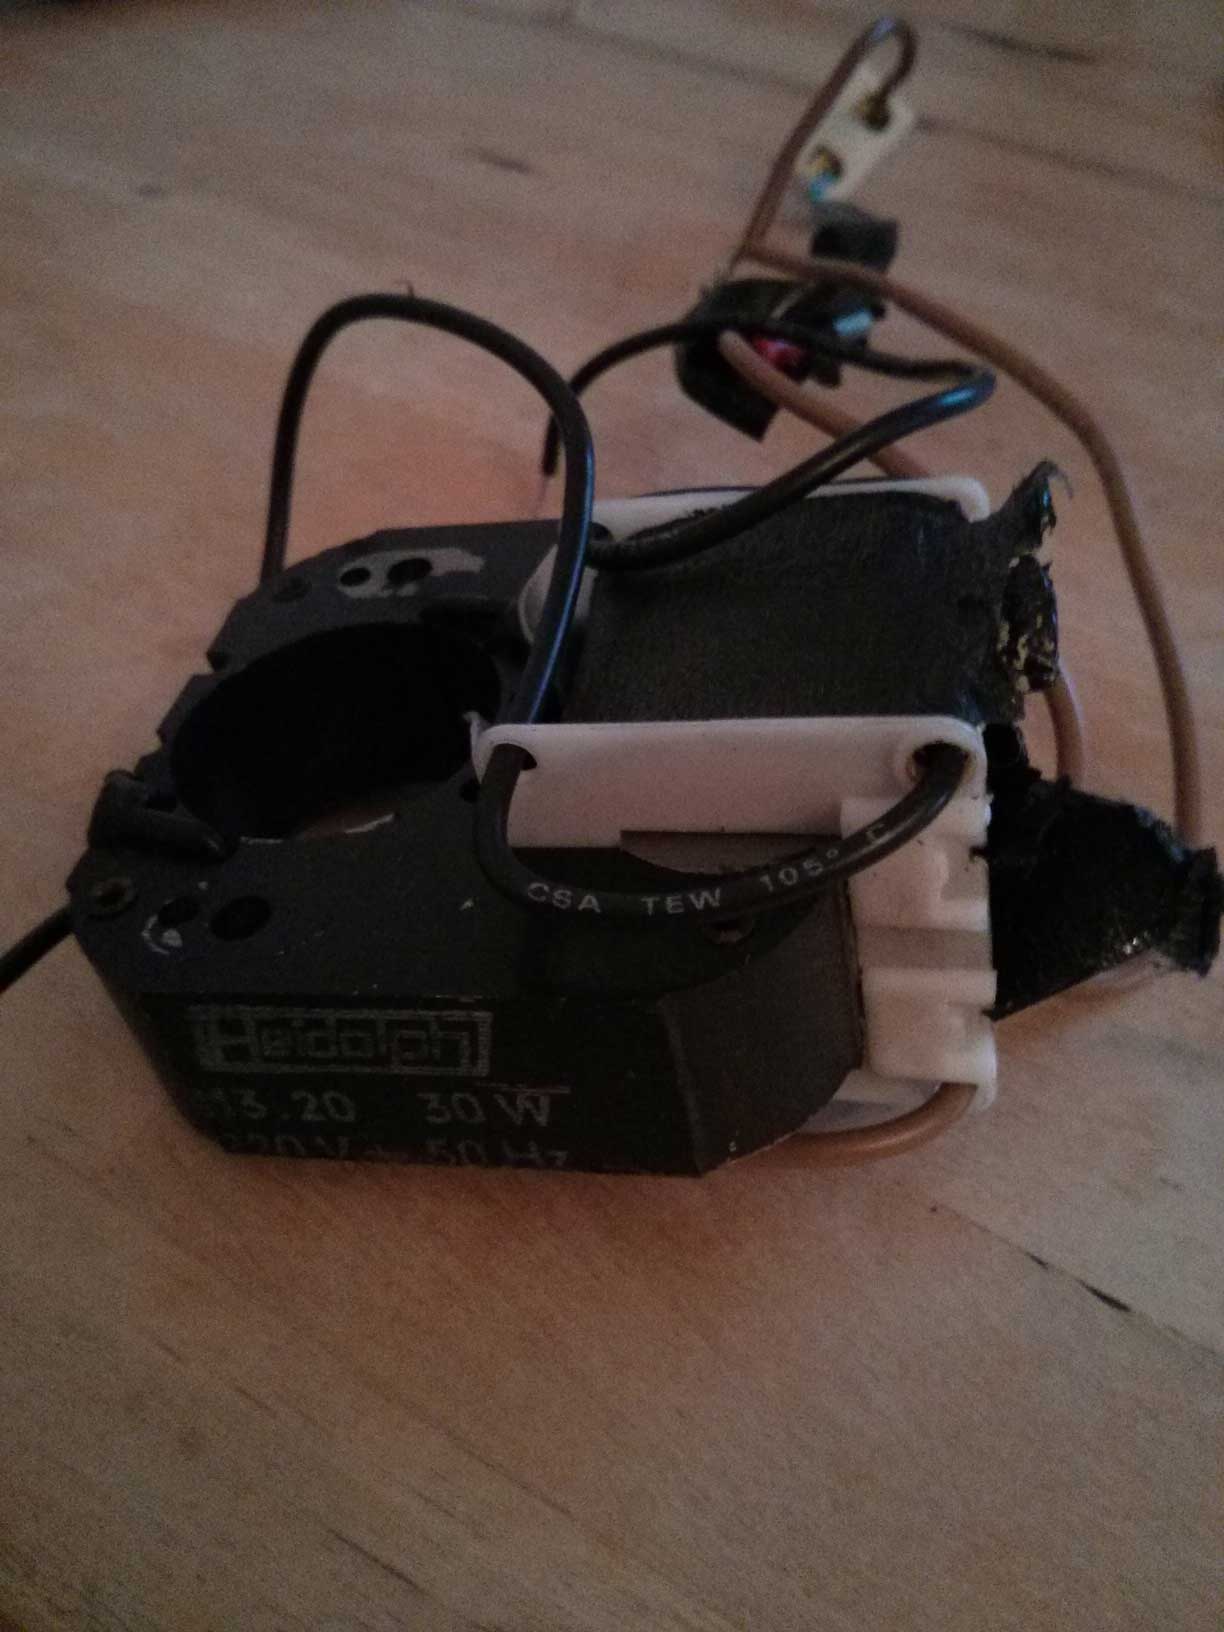
I did not want to give up yet and had the great idea that I will replace the coil. First I thought, there must be one somewhere on ebay or anywhere else. But I was wrong. In the end it became clear, if I want to save the motor, I need to wind a new coil. I started to unwind the coil to see how much copper wire I need, but it became soon obvious, it will be a lot. The unwinding process also revealed the source of the disaster, there were two coils in one: one short one (the one which we hooked up and was probably just there for resistive purposes) and the big one.
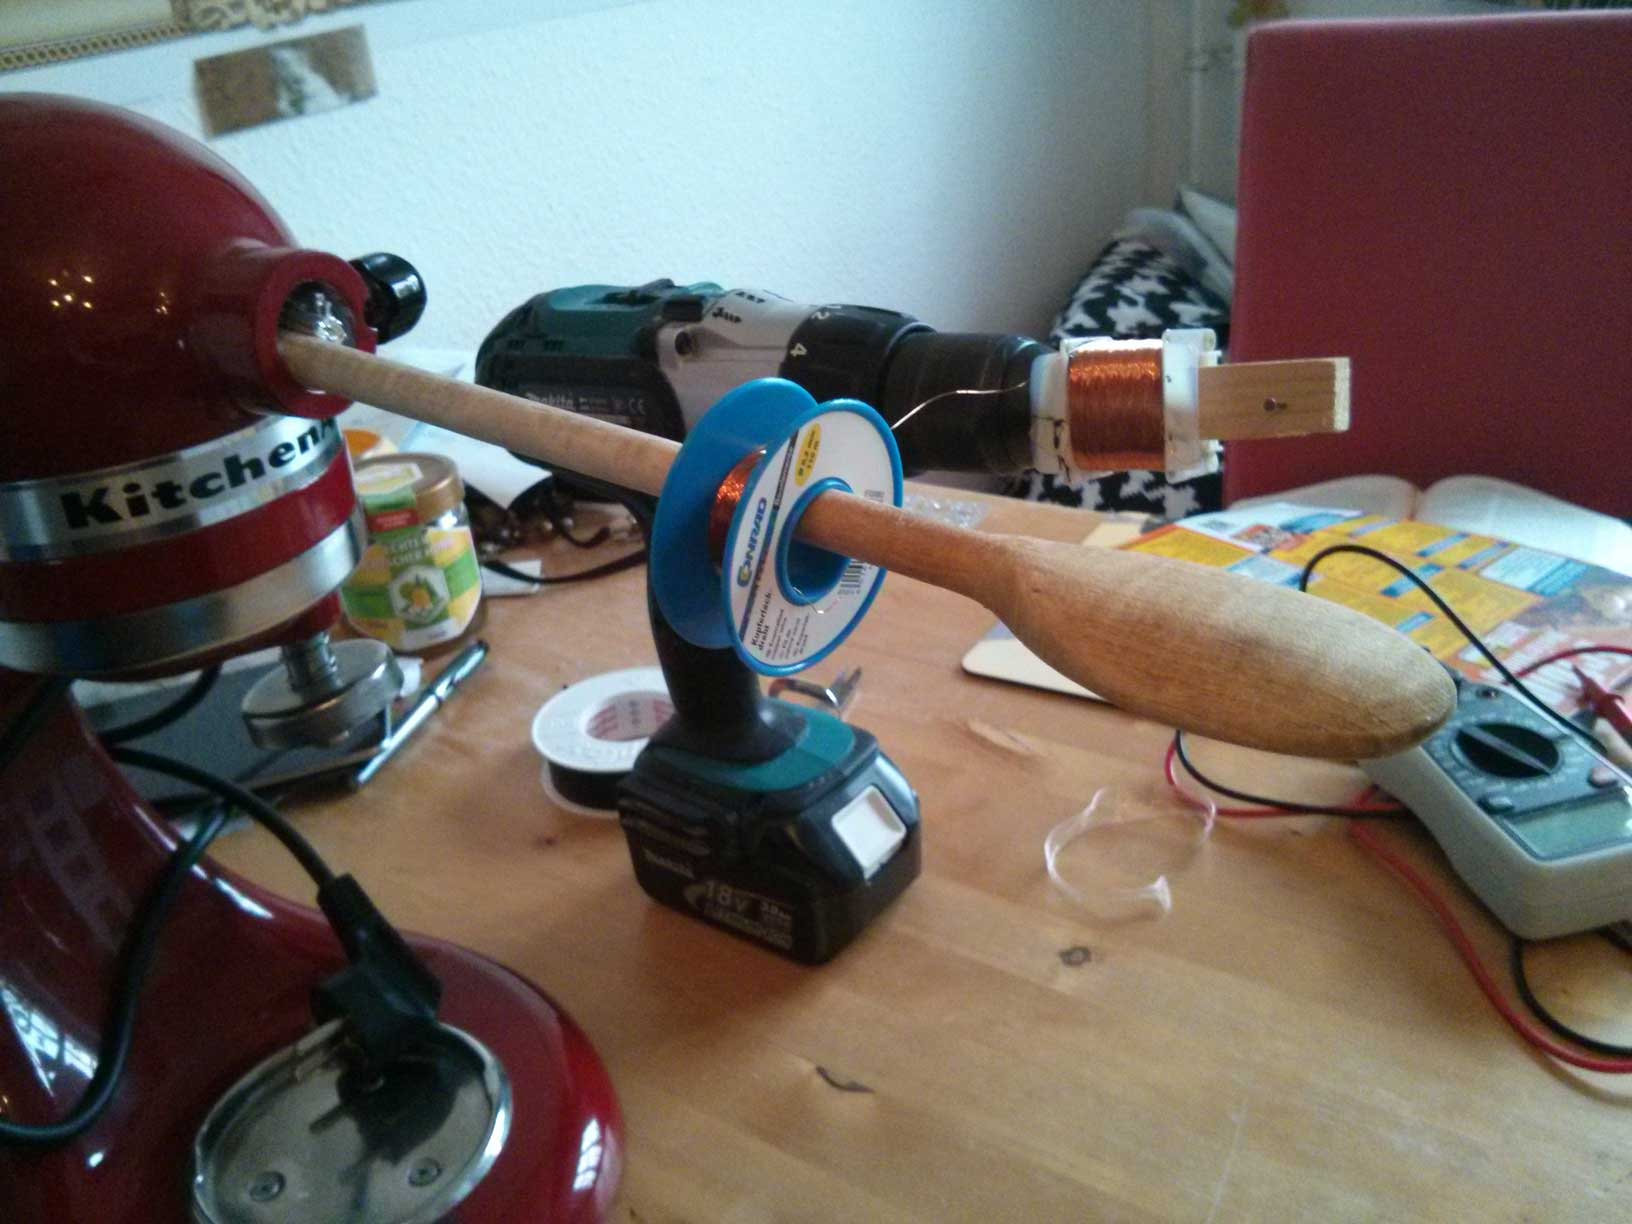
I bought half a kilometre of copper wire of about the same specification as the original one and started to wind that coil. After one hour of manual winding, I realised, I was getting nowhere and if I would continue that way, it would take me days to finish the coil. So I was looking for a solution and eventually came up with an improvised coil winding machinery.
I took a piece of wood and somehow mounted the coil to it. Further I introduced a screw at the side, that was sticking out on the side. I wanted to build an improvised axle. that I mounted to my drill machine. With this and some more improvisation, I was able to wind the coil pretty easily and was done in about another hour.
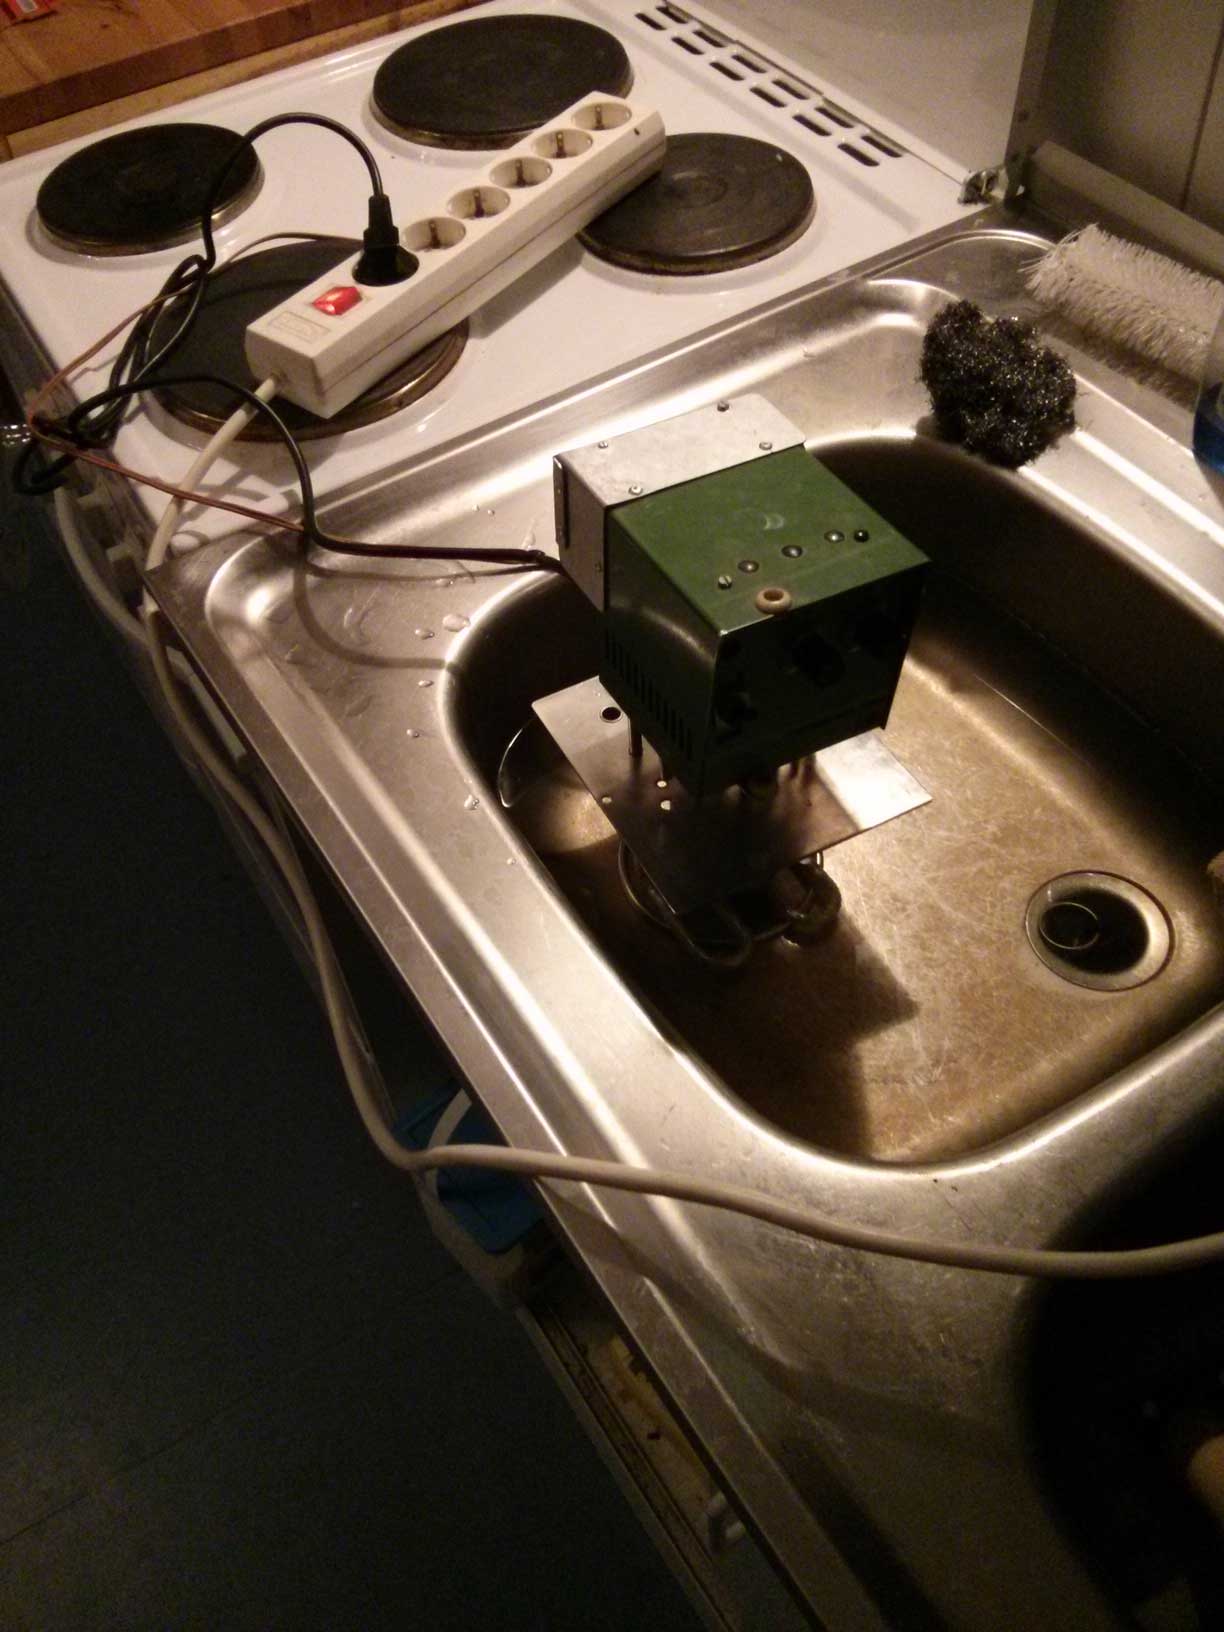
After this task was done and much fiddling around to get the coil back into the iron core, I was able to rebuild the motor. Hooked that thing up again and to my surprise, it actually worked. Happy that everything worked well, I put the whole machinery together again and was looking forward to my first onsen egg. I tested the now repaired Braun Thermomix 1420 in the kitchen sink and left it on for about an hour.
The thermal regulation by the controller electronics worked reasonably well. However after some time of operation I realised, that the stirrer was not working. It stop rotating. After a couple of more taking the Thermomix apart and putting it back together, it became obvious, that I altered the iron core of the motor slightly and that this introduced some friction on the turning parts. Or putting it another way, my coil was too weak.
At this stage I gave up and had to admit defeat. I tried very hard to get that beast going, but apparently I should not have onsen eggs. On a positive side though, I learned a lot and had much fun building everything together :-D
Eventually I came across some nice instructions on how to turn a rice cooker into the perfect sous vide cooking tool using an Arduino: https://www.instructables.com/id/Cheap-and-effective-Sous-Vide-cooker-Arduino-power
This is the solution I eventually pursued and I’m almost there. I can tell you, I already made my first onsen eggs, but the setup was still rather experimental and not suited for everyday cooking. But I’m putting the pieces together and as soon as my sous vide cooker is done, I will post its outcome. And I have to say: the onsen egg was worth all the effort ;-)
DIY · FOOD
electronics hardware hacking sous vide thermomix